How to Set Virtual Location on Unjailbroken iPhone?
07/19/2018
70292
In principle, we could modify the map data of backup data to add an option to set virtual location. At present, this solution only applies from iOS 7 to iOS 10, we would develop the new way for iOS 11 in the future. The virtual location is fixed without changing with space and the simulative location applies any App. If you want to restore, you could reboot your device.
Warm Reminder
1. Please back up one more time to get the backup file in case you can not back up the edited file which may cause the loss of your importance data in your iDevice.
2. Before you amend the specific file, please back up the file you need to amend.
3. If you can not restore the backup file on 3uTools after you amend the file, that means you did not follow the tutorial to amend the file. Please check the file carefully to see the content is correct or not. If you still can not back up the file after you correct it, then you can not set a virtual location on your iDevice.
Operations
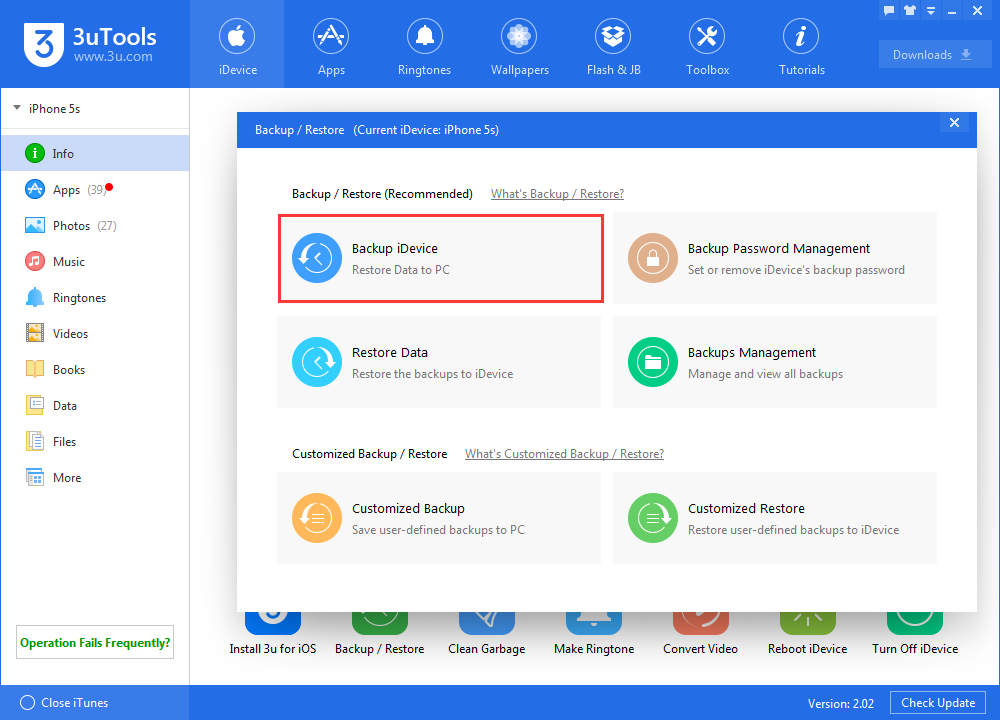
1. Download the latest 3uTools and properly connect your iPhone to your PC. Click iDevice→Backup/Restore→Backup iDevice.
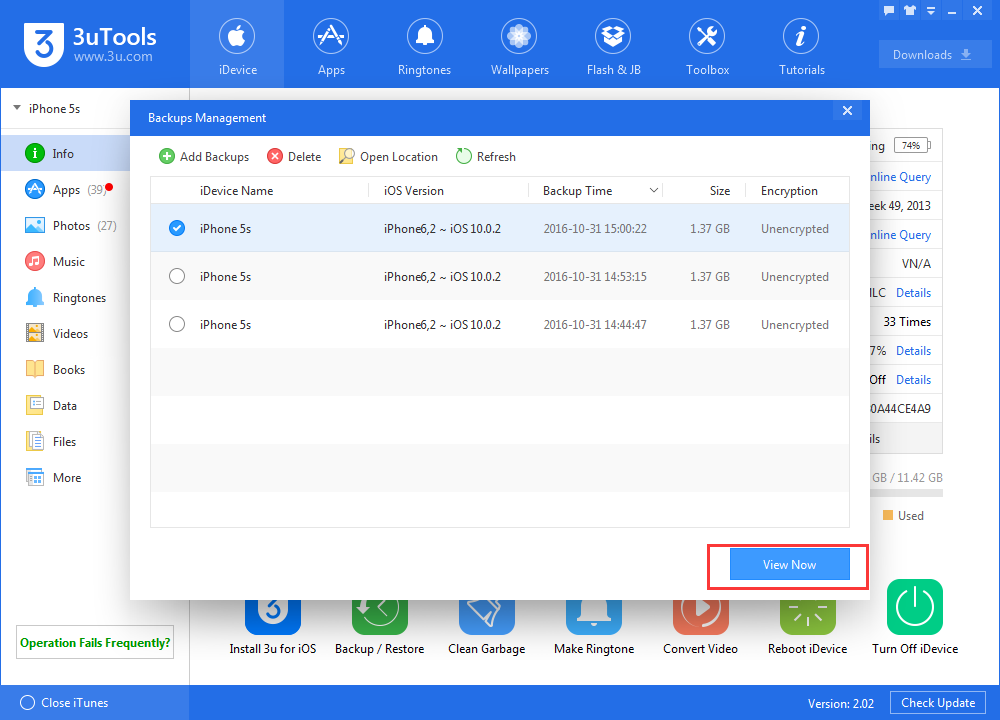
2. After backup, click "Backup/Restore"→"Backup Management", and click the backup data before. Click "View Now".
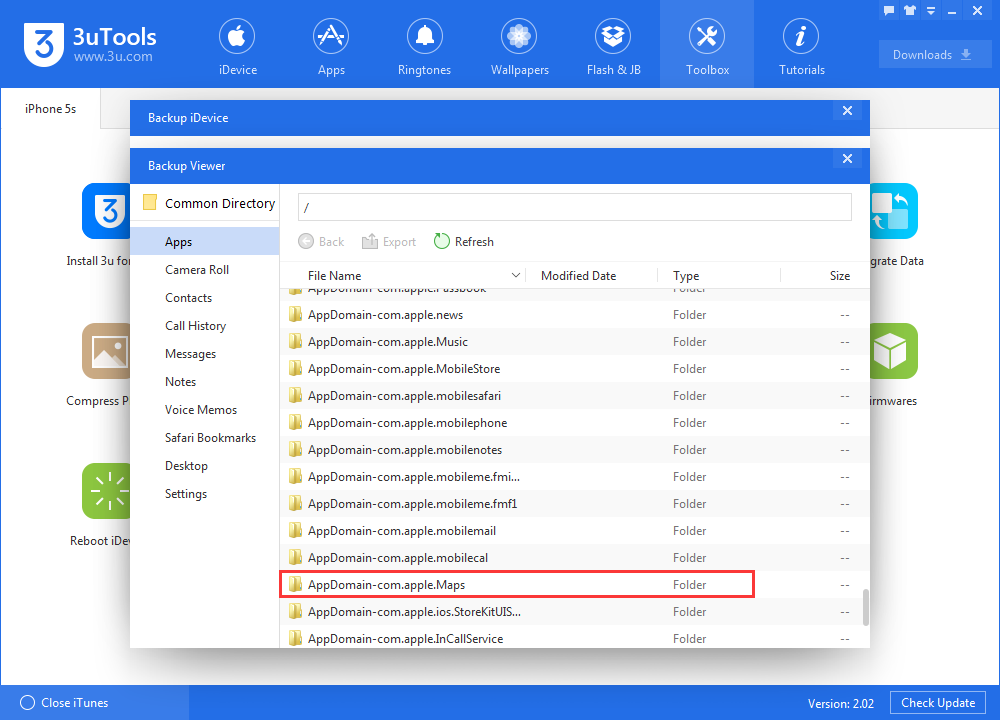
3. On “Backup Viewer”, click Apps and roll down to find “AppDomain-com.apple.Maps”.
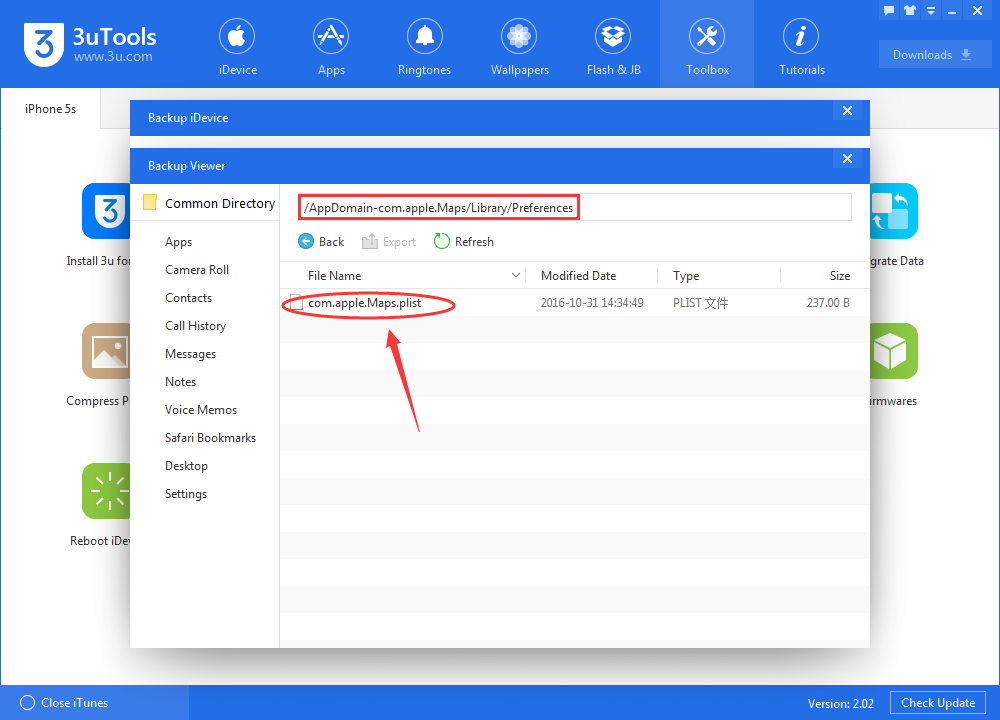
4. Click Library→Preferences, and you can see “com.apple.Maps.plist” file and open it.
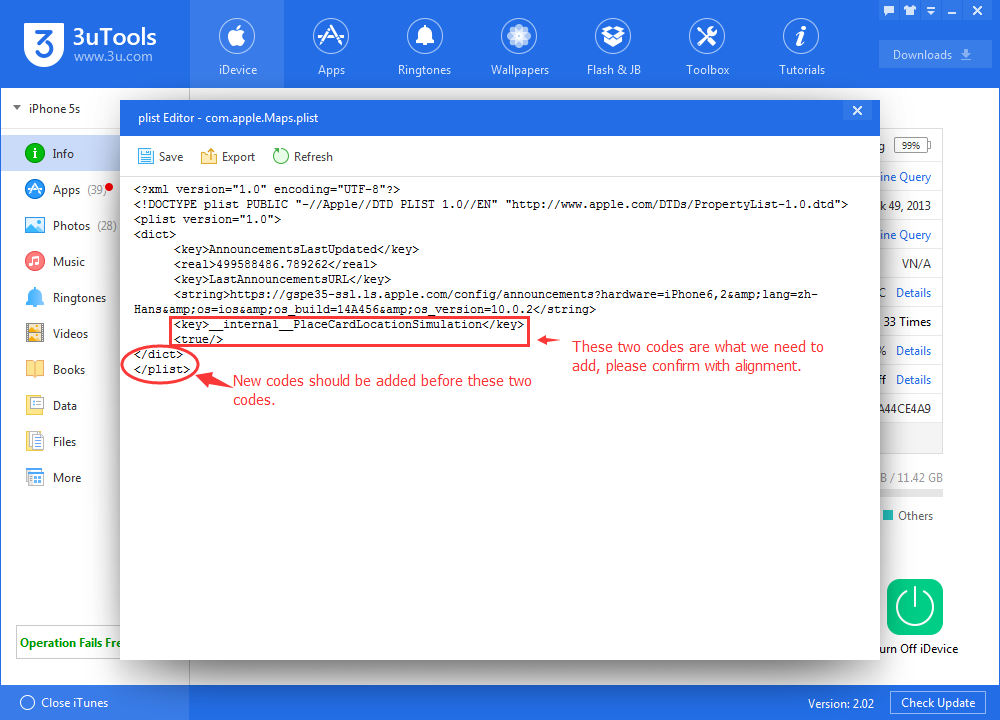
5. As below, roll down to the bottom, copy and paste the below codes before the codes </dict> and </plist>;
<key>__internal__PlaceCardLocationSimulation</key>
<true/>
Confirm with alignment and click “Save”.
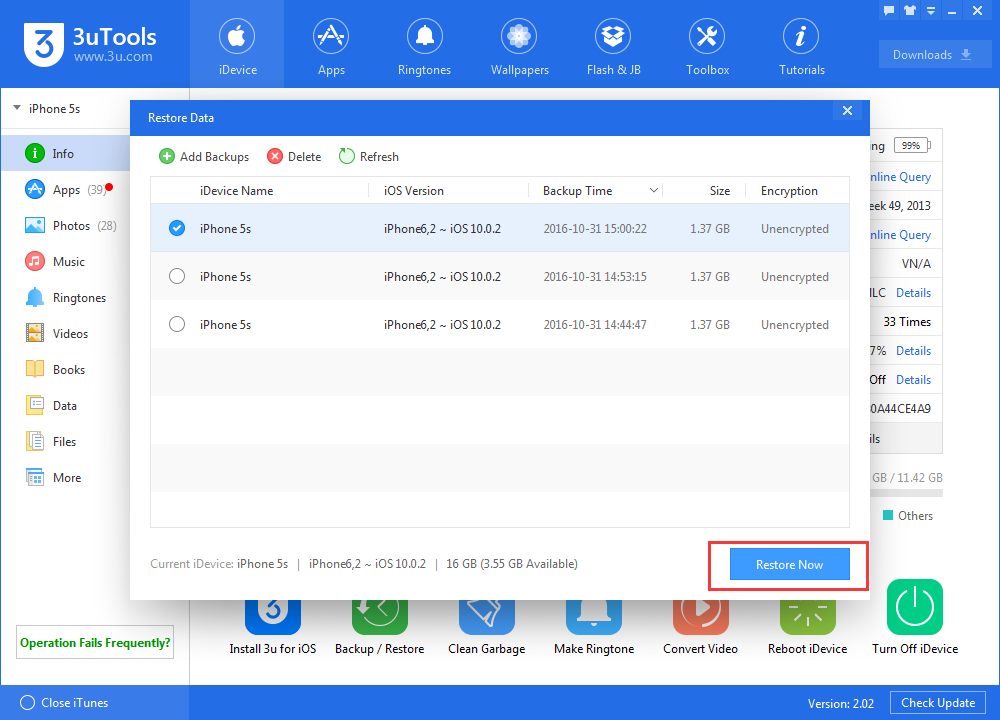
6. Then we need to restore the backups to the device. Click Backup/Restore→Restore Data, and choose the revised data, click “Restore Now”. Just wait patiently.
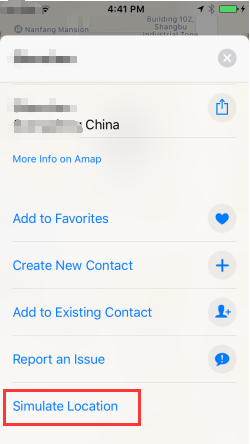
7. Now we open iPhone default Maps and input a random location, we could see “Simulate Location” at the bottom of the screen which means the location is virtual now.
