How to Change the DNS Server on Your iPhone And iPad?
11/07/2017
5786
DNS, or Domain Name System, is a network system used to translate names into IP addresses. Your ISP has its own DNS server that is used by default on all your iOS devices, but you can also point it to a different DNS server.
If you’ve ever experienced a situation where a site opens up on other connections, but not on your connections, changing the DNS could fix the issue. This tutorial is mainly showing how to change the DNS server on your iPhone or iPad.
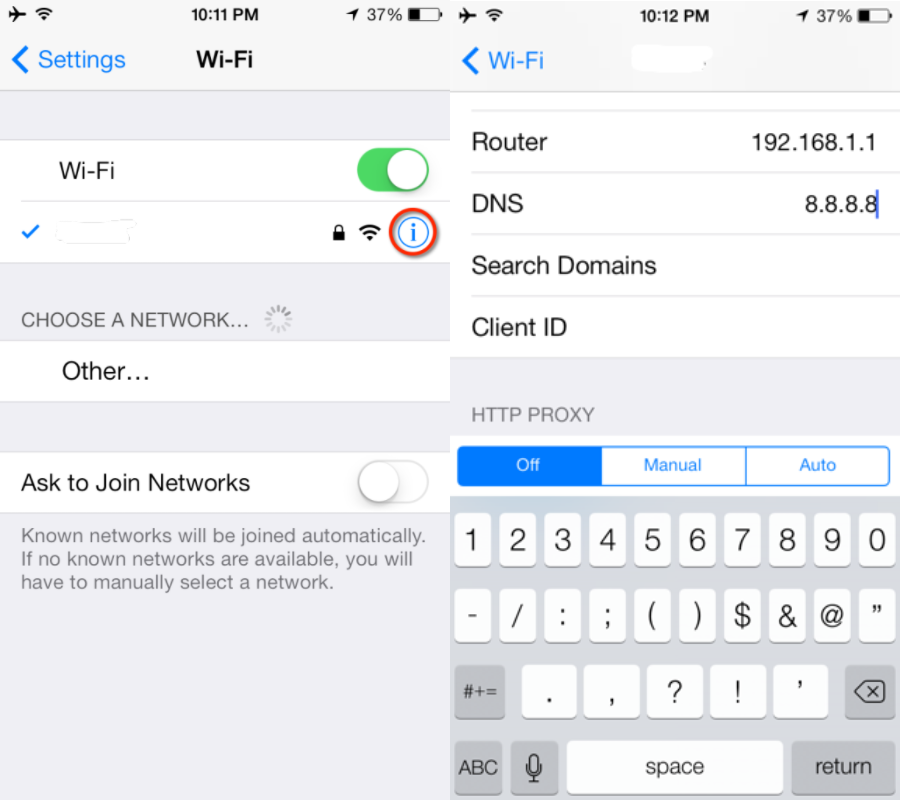
* Open the Settings app on your device, and click the Wi-Fi menu.
* Find out your Wi-Fi connection from the list of available networks, and click the i button on the right.
* Scroll down until you see the DNS section, and tap on the numbers to the right.
* A keyboard should appear, and you can now enter the new DNS server address. Tap on Wi-Fi to go back, once you’re done.
What DNS server to use ?
* Google DNS: Google operates a free DNS service that promises speed, performance and security. To use Google’s DNS, use any of these addresses in the DNS field:
8.8.8.8
8.8.4.4
* OpenDNS: Open DNS is another free DNS service that promises speed, reliability, and security. You can enter either of these addresses to use OpenDNS:
208.67.222.222
208.67.222.220
