How to Record Ultra Slow Motion Video on Your iPhone
02/07/2018
4593
By default, iOS devices are set to capture slo-mo video in 1080p at 120 FPS. Here’s how to adjust settings appropriately when you’d like to shoot fast-paced scenes in ultra slow motion.
Only iOS devices powered by Apple’s A11 Bionic chip or newer (iPhone 8 and iPhone X) can shoot 1080p/240 FPS slo-mo video. Older hardware (iPhone 7, iPhone 6s and iPhone 6) limits 240 FPS slo-mo capture to the 720p resolution (1,280-by-720 pixels).

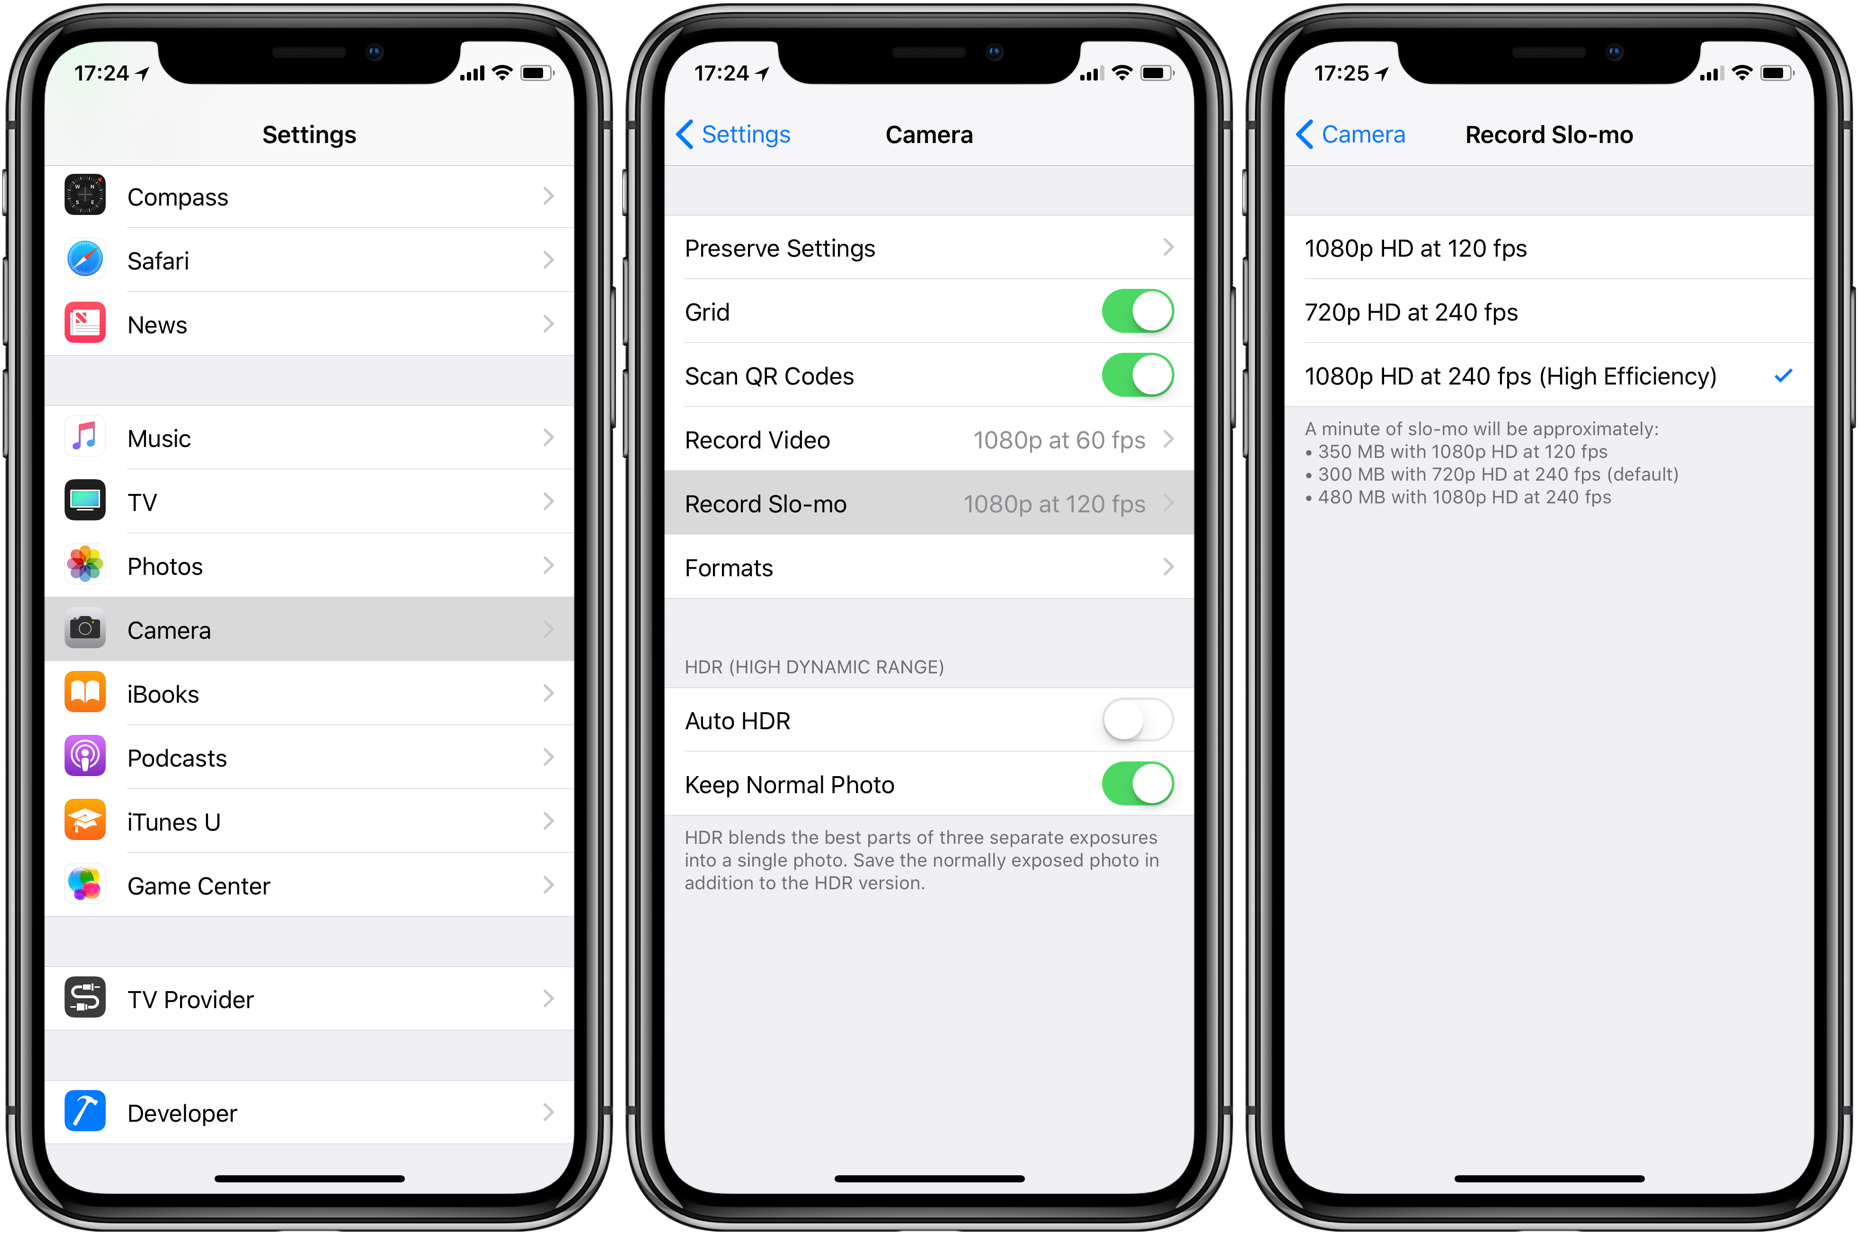
1) Open the Settings app on your iPhone.
2) Tap the Camera section in the list.
3) Tap the sub-section labeled Record Slo-mo.

1080p/240 FPS slo-mo video requires the H.265 codec for efficient compression
4) Toggle on the option labeled 1080p HD at 240fps. You won’t see the camera formats menu on unsupported devices.
5) Close out the Settings app and launch the stock Camera app.
6) Choose Slo-Mo at the bottom of the interface.
TIP: To make iOS remember the last-used mode like Video or Photo, go to Settings → Camera → Preserve Settings and slide the Camera Mode switch to the ON position.
7) Tap the Record button or press either Volume button to start and stop recording.

The video will be saved as a H.265-encoded .MOV file inside the Photos app.
Transferring 1080p/240 FPS slo-mo video to a Mac or PC
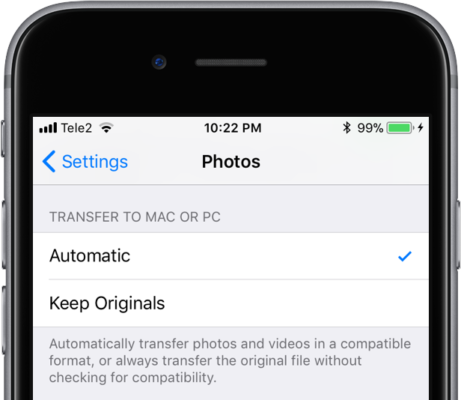
To choose the format in which your media in the Photos app is transferred to a computer when using the USB transfer method, select either the “Automatic“ or “Keep Originals” option in Settings → Photos, below the Transfer to Mac or PC heading.
Selecting “Keep Originals” ensures your movie files get transferred to the computer as-is.

Choose “Automatic” to transfer media to a computer without transcoding
Changing this to “Automatic” will transcode videos during iOS → Mac/PC transfer using the H.264 codec, which increases compatibility at the expense of file size. Use this setting if your computer doesn’t support H.265 hardware acceleration.
You could also manage video using 3uTools, read how to import/export videos from PC to iPhone using 3uTools here.
Source: idownloadblog


